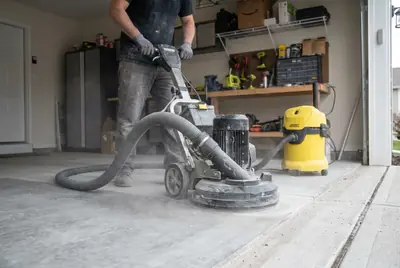
Diamond grinding
Machines with vacuum shrouds open the slab pore by pore. The dust stays in the extractor, not on your shelves or the car in the driveway.

One crew grinds your garage or basement slab, fixes the cracks, and pours an epoxy floor you can wipe clean with a mop. Priced per square foot, in writing, before anything is mixed.
Tell us about the slab. The estimate comes back in writing.
Are you tired of looking at those dull, cracked, and stained surfaces around your home or business? Imagine stepping into a space that instantly wows with a sleek, durable, and incredibly attractive finish. We're talking about transforming ordinary concrete into something truly extraordinary, a surface that's not just functional but also a statement piece.
This amazing surface treatment is more than just a coating; it's a high-performance shield that breathes new life into your floors. It's a professional application that bonds deeply, creating a seamless, resilient layer that stands up to just about anything life throws at it. Think about the relentless foot traffic in a busy garage, the spills and drips in a workshop, or even the everyday wear and tear in a home's living areas.
You might be wondering what makes this particular kind of floor finish so special. Well, for starters, its durability is off the charts. Unlike paint that chips and peels, this material cures into a solid, incredibly tough surface. This means fewer worries about scratches from dropped tools, tire marks in your garage, or scuffs from kids and pets. It's a long-term investment that pays dividends in terms of appearance and longevity.
Furthermore, the aesthetic possibilities are virtually endless. You can opt for a classic, solid color that gives a clean, modern look, or you can dive into a world of decorative flakes that create a stunning, granite-like appearance. Some even incorporate metallic pigments for a truly unique, eye-catching effect. This kind of customization lets you match your floor to your personal style or your business's brand.
Now, you might picture this being a quick slap-on job, but a truly great result involves a bit more finesse. It begins with meticulous preparation of the existing surface. This isn't just a quick sweep; it means grinding down the concrete to create a perfectly clean and porous profile. This step is absolutely critical because it ensures a strong, lasting bond for the new finish.
Following that, any necessary repairs to cracks or divots are made, ensuring a perfectly smooth canvas. Once the surface is prepped and ready, the first layer of the special resin is applied. This is the foundation, the critical layer that will adhere to the concrete and provide the base for everything else.
Then comes the really fun part for many people - the decorative elements. If you're going for that multi-dimensional look, this is where finely crafted vinyl flakes are broadcast onto the wet coating. They settle in at random angles, creating a beautiful, natural-looking pattern that hides minor imperfections and adds significant visual depth. The density and color of these flakes can be adjusted to achieve your desired aesthetic.
And don't forget the topcoat. This clear, protective layer is applied after the base has cured. It seals in the decorative flakes, provides an additional layer of protection against chemicals and abrasion, and gives the entire floor its signature sheen. This topcoat is often made of a different, even harder resin, like polyaspartic, for ultimate resilience.
Let's talk about what this truly means for you. Imagine your garage, no longer a dusty, drab space, but a basement-quality area where you actually enjoy spending time. This finish is incredibly easy to clean. Spills wipe up in seconds, and dust and dirt don't embed themselves into the surface. This makes maintaining a spotless environment a breeze, saving you precious time and effort.
Consider your basement. Instead of that cold, unfinished concrete, picture a warm, inviting recreation room or home gym. This transformation can make previously underutilized spaces feel like extensions of your living area, adding significant value to your home. The increased light reflectivity from a brighter floor also makes these spaces feel larger and more open.
Now, not all these robust surface treatments are created equal, and understanding the options is key. The most common type involves a blend of resins and hardeners, which, when mixed, create a chemical reaction that cures into a hard, durable layer. These are often referred to by their chemical makeup, like epoxy.
Another popular option, especially for high-traffic areas or when a super-fast cure time is needed, is polyaspartic. This material offers even greater scratch resistance and UV stability than traditional epoxy, making it ideal for outdoor applications or areas that get a lot of direct sunlight. It also cures much faster, meaning you can get back to using your space sooner.
While DIY kits are available, achieving a professional, long-lasting finish requires specialized knowledge and equipment. The preparation steps, as mentioned, are vital and often involve home grinders and vacuum systems to control dust. The application process itself requires precise mixing ratios and careful timing to ensure an even, flawless finish.
Furthermore, professionals have access to higher-grade materials that offer superior performance and longevity compared to what's typically found in consumer-grade kits. They understand the nuances of different concrete types and environmental conditions, ensuring your floor is installed correctly the first time. This prevents costly mistakes and ensures you get the beautiful, durable surface you're expecting.
You might be wondering about the smell during application. Most modern formulations have very low VOCs (volatile organic compounds), meaning the odor is minimal and dissipates quickly. Professionals will ensure proper ventilation, and you can usually return to your space within a day or two, depending on the specific system used.
Another question often arises about slip resistance. While these finishes can be slippery when wet, especially with a high-gloss topcoat, this is easily addressed. Additives can be incorporated into the topcoat to create a textured surface, providing excellent traction even when damp. This is especially important for garages, walkways, and areas where safety is paramount.
Investing in this kind of floor enhancement is not just about aesthetics; it's about adding tangible value to your property. A beautifully finished floor can significantly boost curb appeal and increase your home's resale value. It demonstrates a commitment to quality and maintenance, which buyers greatly appreciate. For businesses, it creates a more professional and inviting atmosphere for customers and employees alike.
Think about the potential for new uses for your spaces. That forgotten corner of the basement could become a home gym. Your workshop could be transformed into a space you're proud to show off. Even your patio or pool deck can be enhanced with a durable, attractive finish that withstands the elements.
When you decide to move forward, the process typically starts with a consultation. A knowledgeable representative will visit your location to assess the existing surface, discuss your vision, and provide a detailed estimate. They'll walk you through the different options, helping you choose the colors, flake patterns, and finishes that best suit your needs and budget.
This is also the time to ask all your questions. Don't hesitate to inquire about the preparation process, the materials used, the curing times, and the warranty. A reputable contractor will be happy to provide clear, transparent answers, ensuring you feel confident about the project.
Now, if you're in the United States, a state with a population of around 335 million people, you're in luck. There are skilled professionals ready to bring this incredible transformation to your doorstep. Whether you're in a bustling metropolitan area or a more suburban setting, these services are available. Think about the ZIP codes that dot this vast landscape; many homeowners and businesses are already enjoying these enhanced surfaces.
The median household income in this region often supports investments in home improvement projects like this, making it a smart choice for enhancing your living or working environment. It's about making your space work better for you, both functionally and visually.
Once the installation is complete and the topcoat has fully cured, you'll be amazed at the difference. The seamless finish will look incredible, and you'll immediately notice how much easier it is to keep clean. For daily maintenance, a simple sweep or a quick mop with a mild cleaner is usually all that's needed. Avoid harsh chemicals or abrasive scrubbing pads, as these can dull the finish over time.
Regular inspections, perhaps once a year, can help you catch any minor issues early, though with proper installation and care, these floors are designed to last for many years. It's about enjoying a beautiful, functional space without the constant hassle of difficult maintenance. This is the real payoff of choosing a premium floor coating system.
So, if you're ready to ditch those tired, worn-out floors and embrace a surface that's as tough as it is beautiful, it's time to consider this remarkable upgrade. It's an investment that enhances the look, functionality, and value of your property. Imagine the pride you'll feel when guests step into a space with such a striking and durable finish.
Don't settle for ordinary when extraordinary is within reach. Take the first step towards a more resilient, visually appealing, and easier-to-maintain environment. This is your chance to truly elevate your concrete surfaces.
Ready to see what's possible for your floors? You deserve a space that looks amazing and performs even better. Let us help you explore the possibilities and get a clear picture of the investment involved.
Here is the sentence we repeat at every kitchen table: about eighty percent of how your floor looks in five years is decided before the first drop of resin leaves the bucket. Epoxy does not fail in the middle of the room. It fails at the bond, and the bond is made or lost during prep.
A cured slab is smooth, sealed by its own laitance and often by old paint or curing compounds. Resin cannot grip that. We run diamond grinders with dust extraction across every square foot until the surface feels like fine sandpaper, because that texture is what the epoxy keys into.
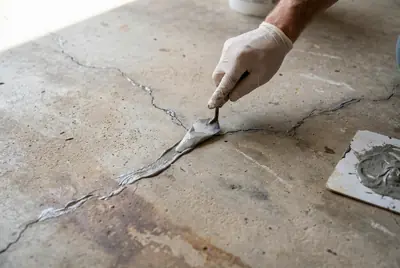
Hairline cracks get chased open, cleaned and filled with a rigid repair paste; spalled patches are rebuilt flush. Control joints are either honored or filled, and we lay out the trade-off of each choice for your garage before you pick.
Ground moisture rising through a basement slab will lift any coating from below. We test for it instead of guessing, and when a slab reads wet we quote a moisture-tolerant base layer or say honestly that epoxy is the wrong answer for that room.
Three ways to finish the same slab. None of them is wrong; they trade looks, grip and forgiveness differently, and the honest comparison fits in one table.
Most garages choose flake, most basements argue between flake and solid, and metallic is picked with the heart. All three get the same prep underneath.
Machines with vacuum shrouds open the slab pore by pore. The dust stays in the extractor, not on your shelves or the car in the driveway.
Chased, cleaned, filled rigid and sanded flush. Repairs disappear under flake; under metallic we flatten them until the light stops finding them.
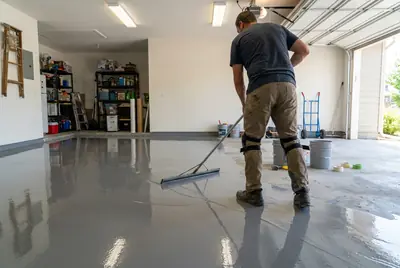
Pigmented epoxy goes down in ribbons and is pulled tight with squeegees, working from the far wall to the door so nobody paints themselves into a corner.
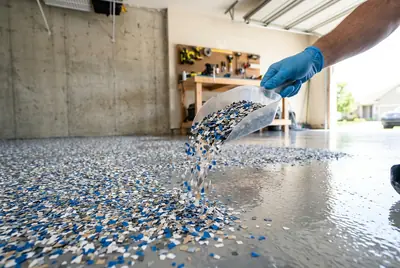
Thrown by hand into the wet base until the floor refuses to take another chip. The loose surplus is scraped and recovered the next morning.
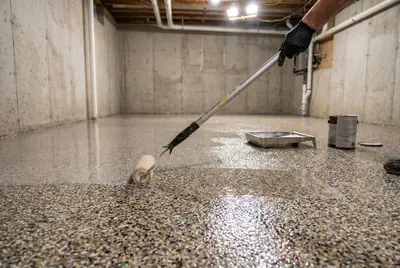
A chemical-resistant clear coat locks the color down and carries the actual wear. This is the layer your tires, ladders and dropped wrenches will meet.
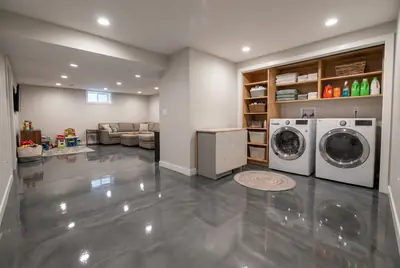
We walk the finished floor with you, leave a one-page care sheet, and tell you to the hour when feet, furniture and finally the car can come back.
Coats go down and the door stays shut. The resin needs still air and patience more than it needs anything from you.
On a typical cure, socks and light foot traffic are fine a day after the topcoat. Kitchen chairs can wait one more.
Most floors take tires again on the third day. We confirm the exact hour for your resin and your weather before we leave, and it goes on the care sheet.
Cold snaps stretch these numbers and warm dry days shorten them, which is why we give you dates in person rather than promises on a website.
ZIP, the floor in question, your name and number. A crew member, never a script reader, rings back inside a business day.
We come out, measure, read the moisture, poke the cracks and look at where the water goes. You get a square-foot price in writing before we leave the driveway.
Usually two or three, most of it prep. The cars sleep outside, the grinder hums for a day, and the pour itself is almost an anticlimax.
A walkthrough, a care sheet, and the exact hours for feet and tires. If anything bothers you in the first weeks, the same crew comes back to look.
Slab condition moves every line, mostly through prep hours. The walkthrough turns these brackets into one written figure for your floor.
The internet is full of peeling garage floors, so let us say the quiet part out loud. Nearly every failed epoxy job fails the same way: hot tire pickup, where a warm tire parks on a poorly bonded coating overnight and peels it off like a sticker on the way out. That is not an epoxy problem. It is a prep problem, which is exactly why the grinder gets a whole day and the roller kit from the hardware store does not stand a chance.
Sunlight is the other truth. Plain epoxy yellows slowly under UV, which matters at a bright garage door and in a walk-out basement. Where the sun reaches, we finish with a UV-stable topcoat and tell you plainly which parts of the floor will see the most light.
Treated fairly, a properly ground and coated floor keeps its gloss through years of tires, bikes, paint cans and dropped tools, and a tired one can usually be revived with a single recoat instead of starting over. We put the workmanship promise in writing with the estimate, in sentences, not asterisks.
You can, and for a year it may even look fine. The kits are thin, the prep instructions amount to washing the slab, and the bond shows it. What we grind, repair and build up in layers is a different product that happens to share a name.
Plan on two to three working days of coating plus the cure: feet at about a day, tires at about three. Most families park in the driveway for a week and never think about it again.
It will hide repaired cracks. Unrepaired ones telegraph straight through, which is why chasing and filling them is part of every quote instead of an upsell. If a crack is still moving, we flag it before any money gets spent over it.
A bare gloss coat can be, so we do not hand those over. Flake floors carry their own texture, and smooth finishes get an anti-slip grit stirred into the topcoat. You choose how much bite you want; sock-footed households usually go finer.
It is the first thing we measure. Mild readings call for a moisture-tolerant base layer under the epoxy; heavy ones mean epoxy is the wrong tool, and we tell you that at the walkthrough instead of after the peel.
Old paint comes off, not gets covered. The grinder strips it back to honest concrete, because a new coating is only ever as attached as whatever sits underneath it. Budget-wise it is a line of prep hours, not a mystery.
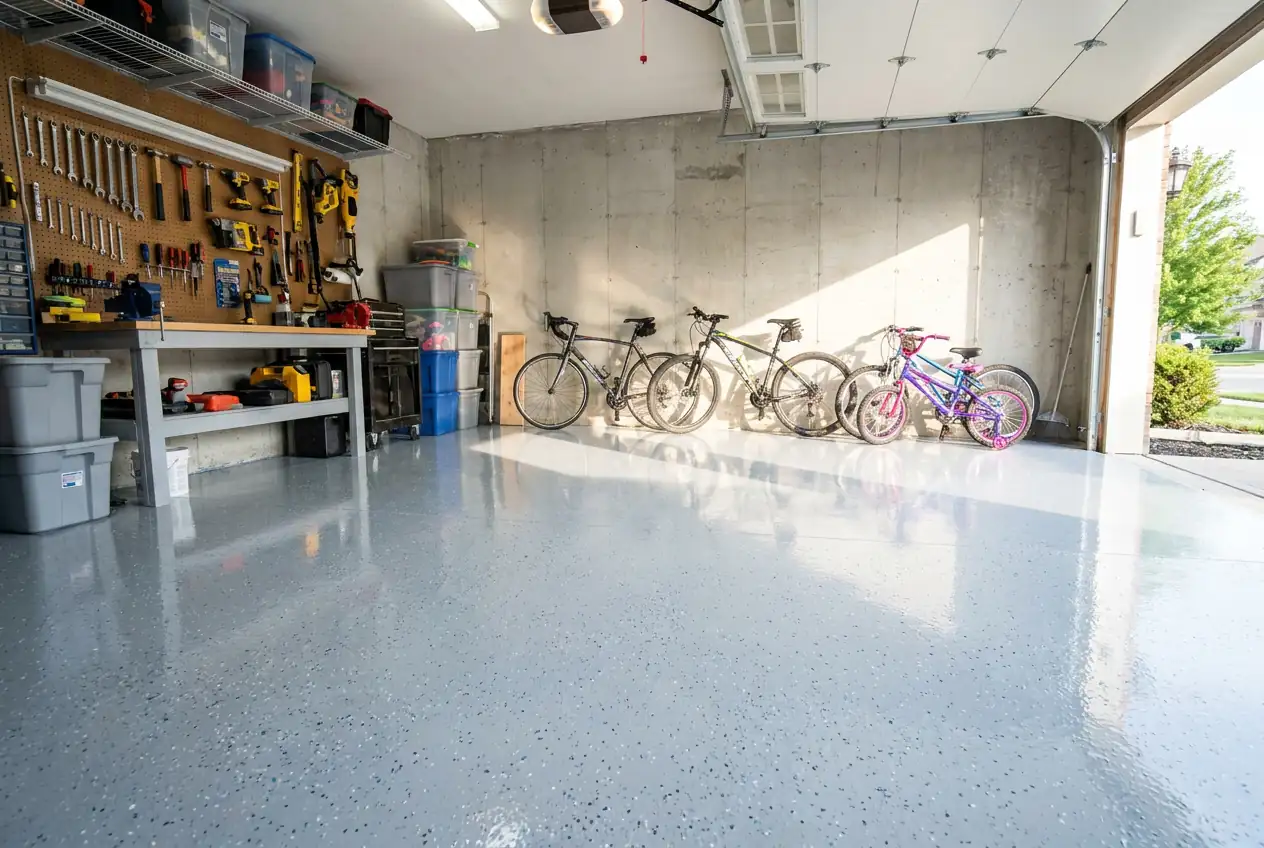
No staged pictures of empty rooms. This is what a lived-in garage looks like when the slab underneath finally got taken seriously: bikes, tool wall and all, on a sheet of color you can mop on Saturday morning.
Freeze-thaw in the north, humidity in the south, hard sun out west: the slab problems change by state, the standard of prep does not. Pick out your state or city below.
Your slab is already there. The shine is one visit away.
Get my written estimate